Drawing
Free drawing
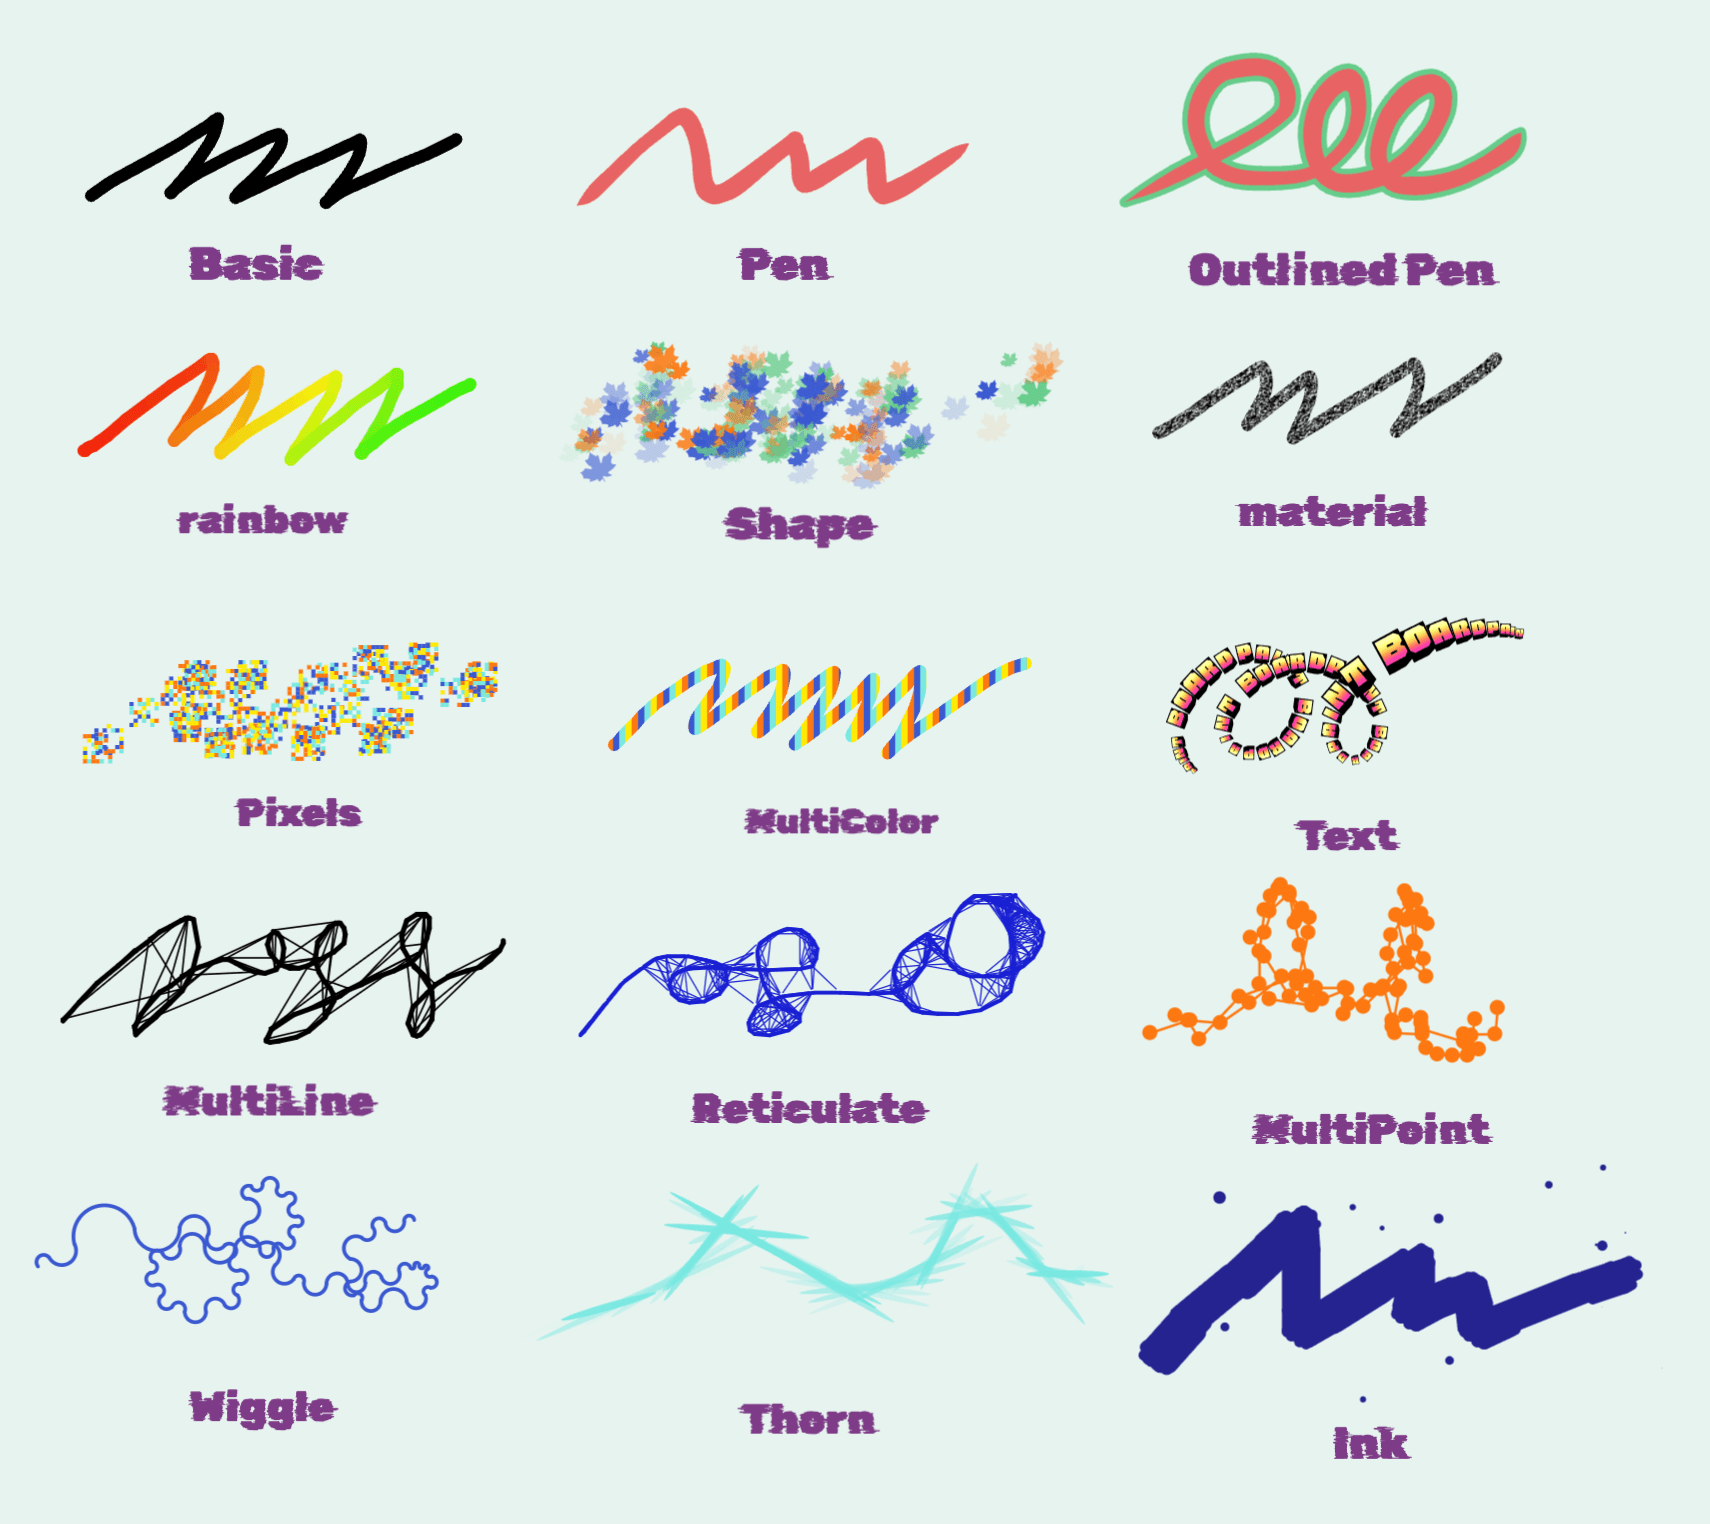
The brushes in the figure below are the ones available now. In Draw mode, switch to free drawing to use them.
Brush settings
You can set width, color, type, and shadow. Some brushes add their own settings, such as the material on the material brush, the font on the text brush, and the shape type and count on the multi-shape brush.
Shape drawing
In Draw mode, switch to shape drawing. You can set line width, line style, line color, fill color, and fill style.
Add a custom shape
You can add any icon from Lucide. Search for it on lucide.dev/icons, type the name into the field, and click add. smile, Smile, and kebab-case such as arrow-down all work.
To remove one, drag the custom shape onto the delete area.
Text
Click the text button on the bottom toolbar. A text box appears in the center of the view. Type into it.
- Select the text again, and the Select panel can set bold, italic, underline, strikethrough, text color, and font.
- Double-click text that is already on the board to edit it again.
Fonts
Three fonts are built in: Georgia, Fredoka One, and Hanalei Fill. In font settings, type a name to add a font from Google Fonts. You can add up to five custom fonts. To show one in the tool panel, click the button that pins it there.
Pictures
Click the image button on the bottom toolbar to add a picture. In addition, the PC version supports dragging and dropping images directly onto the canvas to add them.
After you pick a file, the upload window can crop it, remove the background, or run image segmentation.
Background removal and image segmentation need WebGPU. A current version of Chrome is the better choice for those two features. The first use downloads a model, so it takes longer than a plain upload.
Once the picture is on the board, Select mode can move, scale, rotate, and drag it, and can apply filters such as vintage, invert, black and white, noise, blur, and pixelate.